Introduction
Sifter is a penetration testing tool. In this tool, we have information gathering tools, scanning tools for Network, web applications and websites. To exploit the vulnerabilities, we also have exploitation tools and finally honeypot detection system. We see all the tools, placed in one tool. Using this tool, we can reduce our time and efforts. So today we will show you how this tools can be used in your penetration testing tasks with 35 tools in one tool, so can be called as Swiss Army Knife of Penetration Testing. According to ethical hacking researcher of International institute of Cyber Security, every pentester looks for tools that can help them to do their job easily.
We will show you on how to use this tool in your environment in a step by step process from installation to execution.
Environment
- Os: Kali Linux 2019.3, 64 bit
- Kernel version: 5.2.0
Installation Steps
Use this command to clone the tool git clone https://github.com/s1l3nt78/sifter
root@kali:/home/iicybersecurity# git clone https://github.com/s1l3nt78/sifter
 Cloning into 'sifter'...
 remote: Enumerating objects: 108, done.
 remote: Counting objects: 100% (108/108), done.
 remote: Compressing objects: 100% (92/92), done.
 remote: Total 1721 (delta 54), reused 51 (delta 16), pack-reused 1613
 Receiving objects: 100% (1721/1721), 366.35 KiB | 599.00 KiB/s, done.
 Resolving deltas: 100% (1074/1074), done.
- Use the cd command to enter into sifter directory cd sifter/
- Do ls command to list files
 root@kali:/home/iicybersecurity# cd sifter/
 root@kali:/home/iicybersecurity/sifter# ls
 files  install.sh  modules  README.md  results  sifter
- Use commands to install the requirements and dependencies
- chmod +x install.sh
- ./install.sh
root@kali:/home/iicybersecurity/sifter# chmod +x install.sh
 root@kali:/home/iicybersecurity/sifter# ./install.sh
 Reading package lists... Done
 Building dependency tree
 Reading state information... Done
 arp-scan is already the newest version (1.9.7-1).
 arp-scan set to manually installed.
 dirbuster is already the newest version (1.0-1kali3).
 docker is already the newest version (1.5-2).
 docker-compose is already the newest version (1.25.0-1).
 docker.io is already the newest version (19.03.6+dfsg1-2).
 figlet is already the newest version (2.2.5-3+b1).
 graphviz is already the newest version (2.42.2-3+b1).
 leafpad is already the newest version (0.8.18.1-5).
 nano is already the newest version (4.8-1).
 nmap is already the newest version (7.80+dfsg1-2kali2).
 nodejs is already the newest version (10.17.0~dfsg-2).
 npm is already the newest version (6.14.1+ds-1).
 python is already the newest version (2.7.17-2).
 python-dev is already the newest version (2.7.17-2).
 python-pip is already the newest version (18.1-5).
 python3-dnspython is already the newest version (1.16.0-1).
 python3-geoip is already the newest version (1.3.2-3).
 python3-requests is already the newest version (2.22.0-2).
 python3-requests set to manually installed.
 python3-ssdeep is already the newest version (3.1+dfsg-3).
 python3-whois is already the newest version (0.7-6).
 theharvester is already the newest version (3.1-0kali3).
 wafw00f is already the newest version (2.1.0-1).
 wafw00f set to manually installed.
 nikto is already the newest version (1:2.1.6+git20190310-0kali2).
 wpscan is already the newest version (3.7.9-0kali1).
 The following packages were automatically installed and are no longer required:
   dh-python liblinear3 libxdot4
 =============================================================================================================SNIP================================================================================================================
- Directly, we will land to this below screen shot.
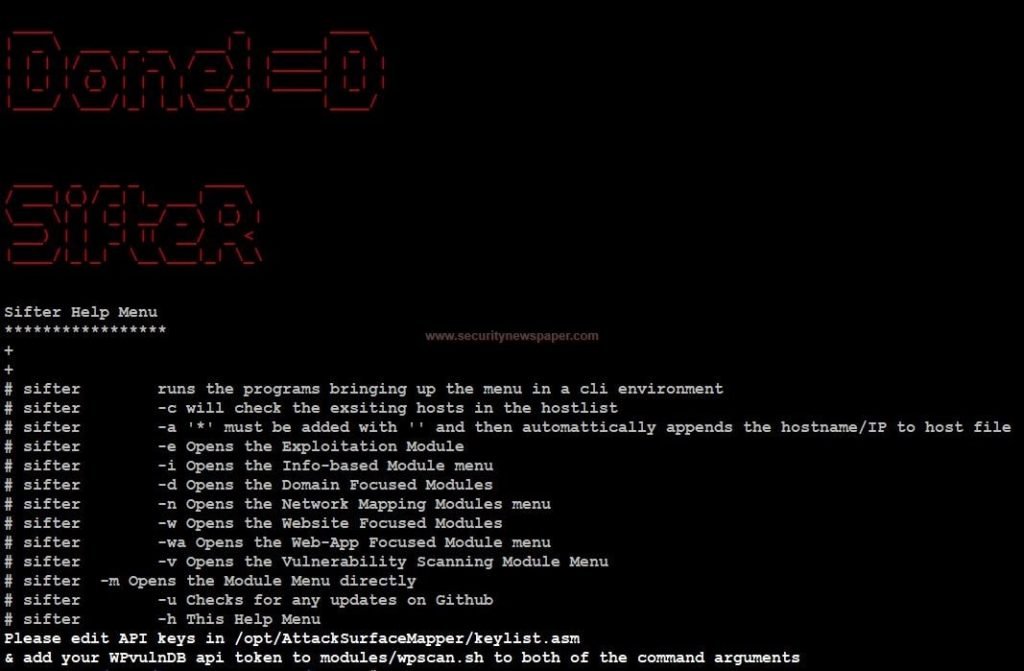
- We can also use help options in the above picture.
- If you are on your shell prompt, type command sifter to lunch the tool.
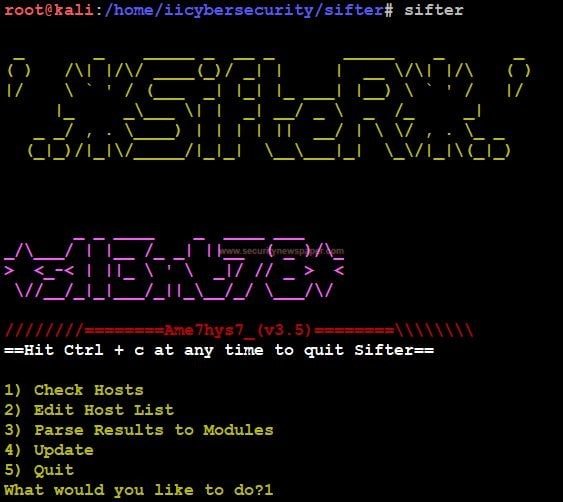
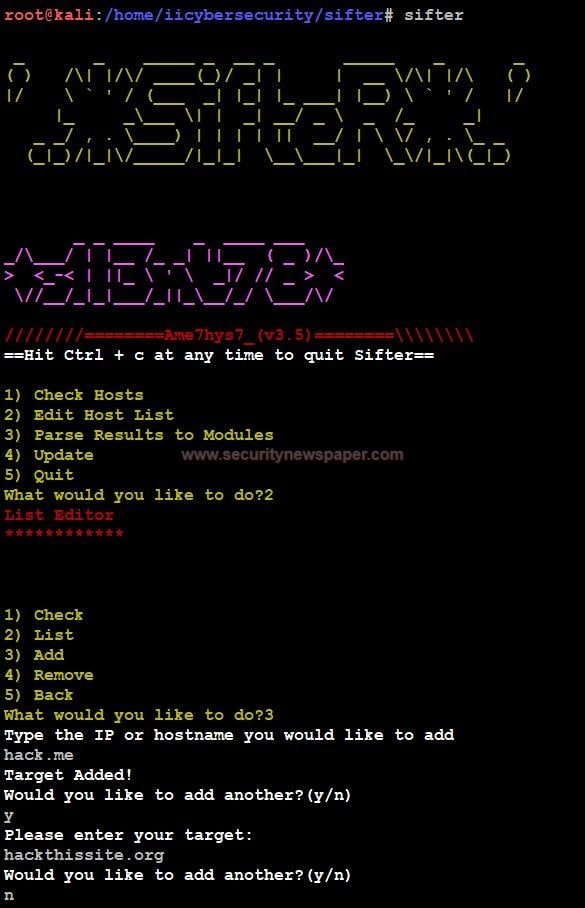
- In this we see four options check Host, Edit host List, Parse Results to Modules, Update, and Quit.
- Before, selecting the option 1, we have to add our host list, by selecting option 2. We can see in the below picture on how to add your Host List.
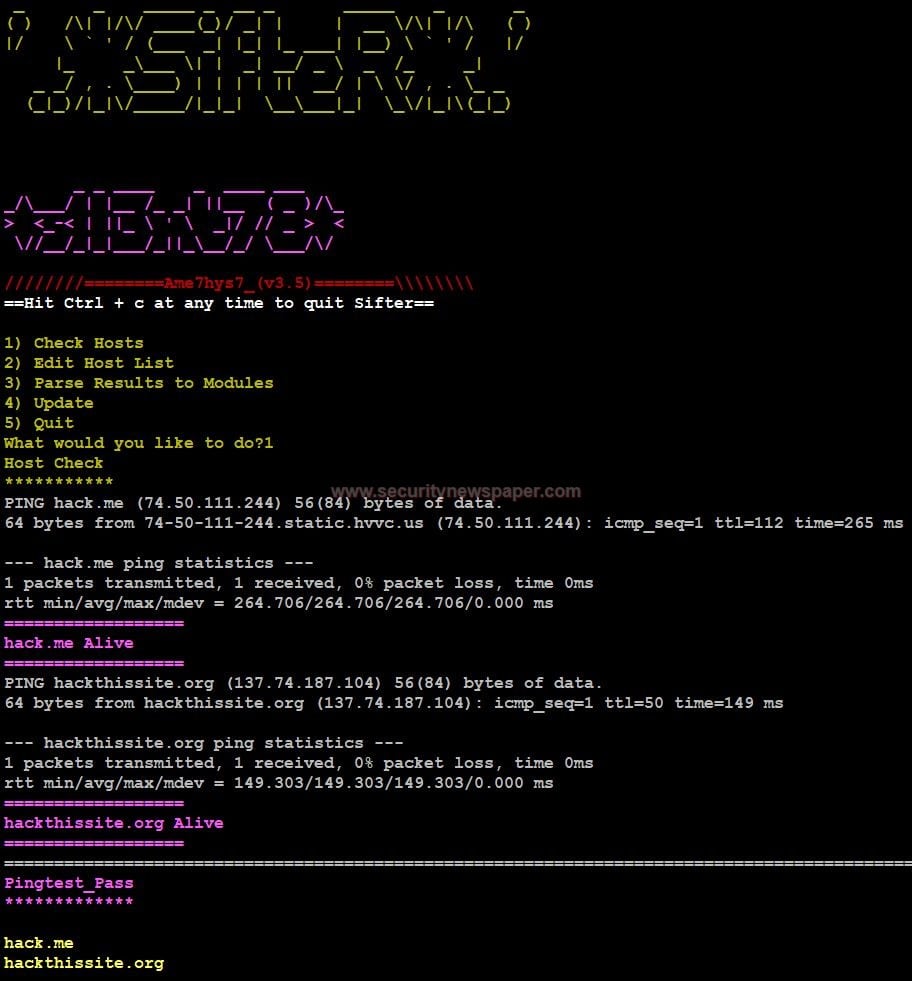
- Now, select option 1 to Check Host. It will check whether the host Alive or dead using PING.
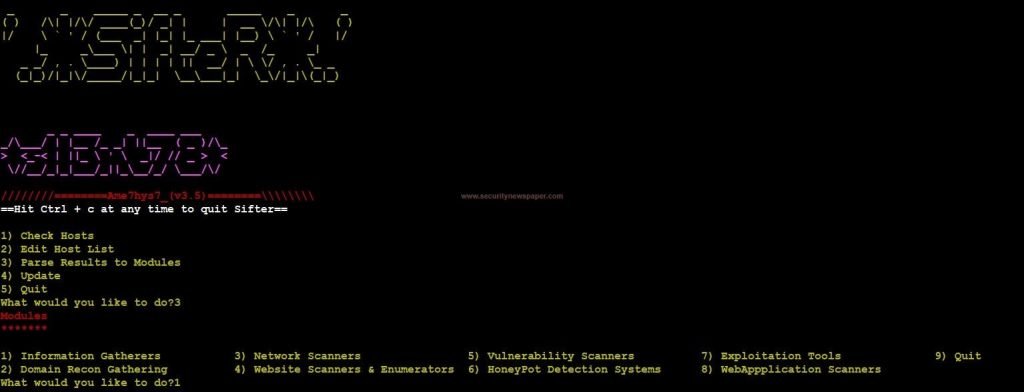
- Now, let’s move to Modules by selecting option 3.
- In these modules, we see all the penetration testing tools at one place Information gatherers, Domain Recon gatherers, Network Scanner, Website Scanner & Enumerators, Vulnerability Scanner, Honeypot Detection System, Exploitation Tools and, Web application Scanner.
Information Gatherers Module
What is information gathering?
Information Gathering, is collecting some unique information about the target.
- Information gatherer, is classified into two type
- Enterprise Focus.
- Individual Focus.
- Enterprise module Focus on target IPs, Emails and, Host. In the Enterprise Focus has 4 different tools
- TheHarvester
- SniffingBear
- Osmedeus
- ReconSpider
- We will show you a specific tool, that shows unique information about the target.
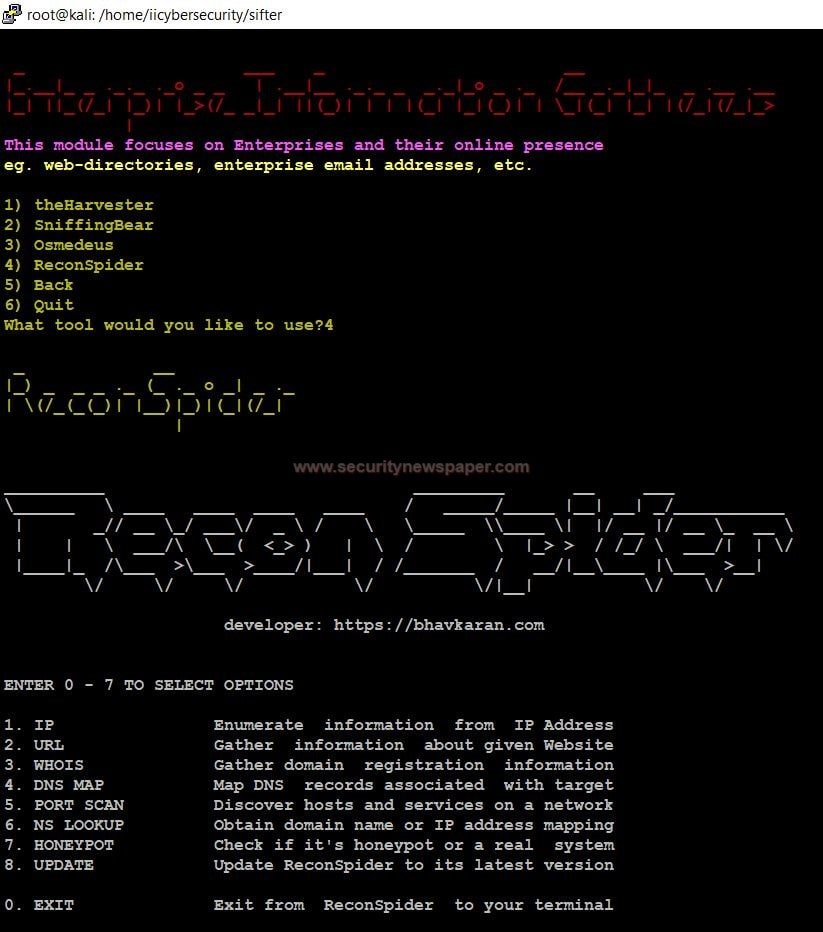
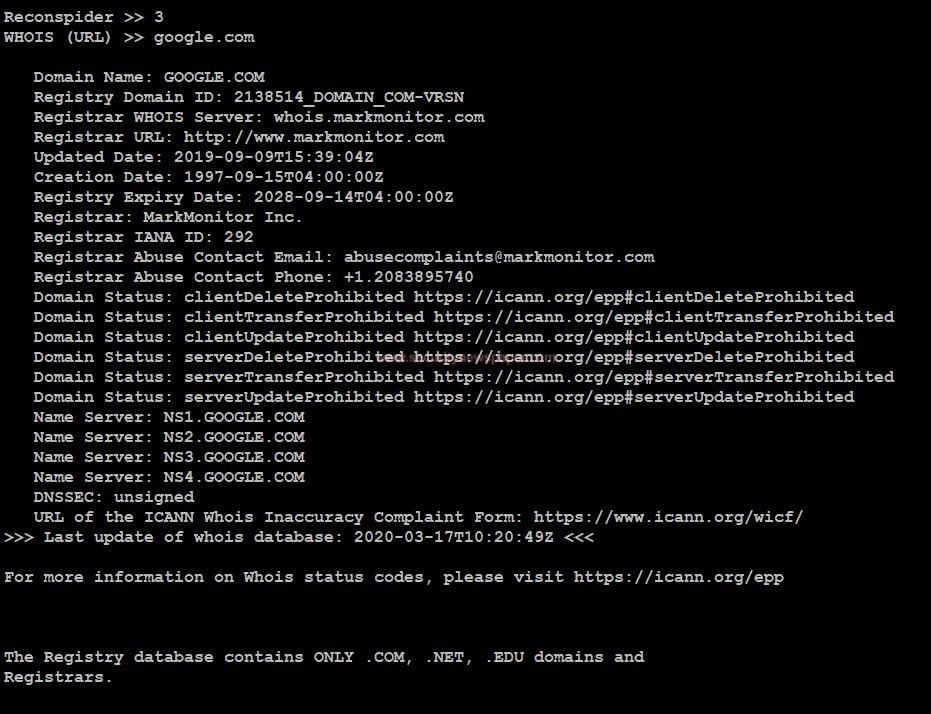
- Choose option 4, to use ReconSpider tool
- Reconspider collects every information about the target like IP, URL, WHOIS, DNS Map, Port scan, Nslookup and, Honeypot.
- Choose option 3 and see, the information about the target.
Domain Recon Gathering Module
- In domain recon gathering, it collects complete domain details about the targeted website.
- In domain recon gathering, we have 4 tool:
- DnsTwist
- DomainFuzz
- Armory
- Omnibus
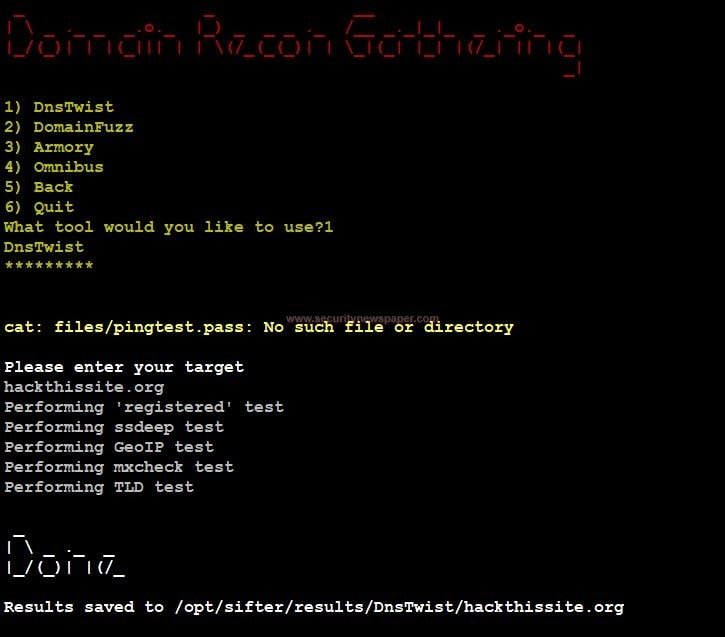
- We can see the results of any respective tool at this path.
root@kali:/opt/sifter/results/DnsTwist/hackthissite.org# ls
 geoip_test.csv  mxcheck_test.csv  registered_test.csv  ssdeep_test.csv  tld_test.csv
- Use cat command to view files content.
Network scanners Module
What is a Network Scanner?
Network scanning tools are for collecting information about the targeted network system. The network scanning is used for hacking the target in network.
- Select option 3 to use network scanner tools
- In the network scanning, we have 5 tools:
- Nmap
- Arp-scan
- AttacksurfaceMapper
- Armory
- Asnip
- We will show you a specific tool that shows unique information about the target.
- Use option 1, to perform network scanning on the target website using the Nmap tool.
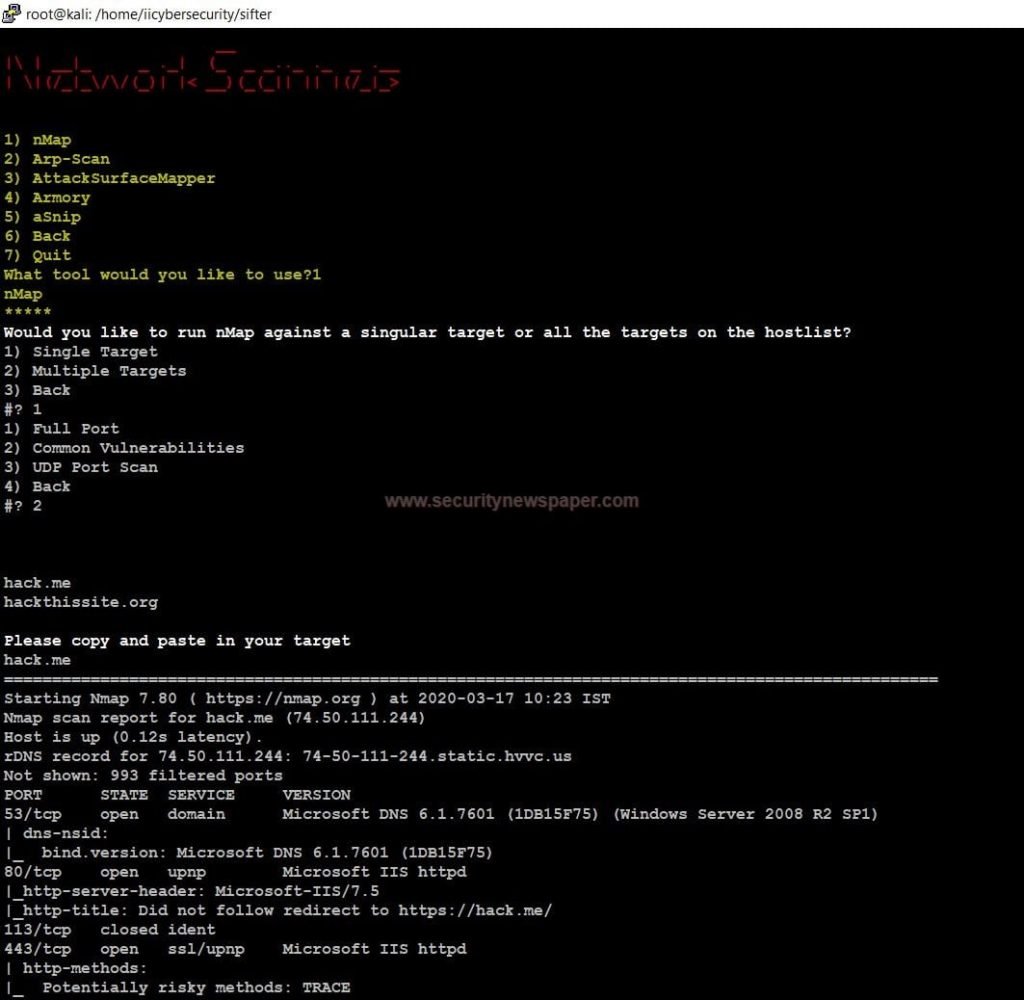
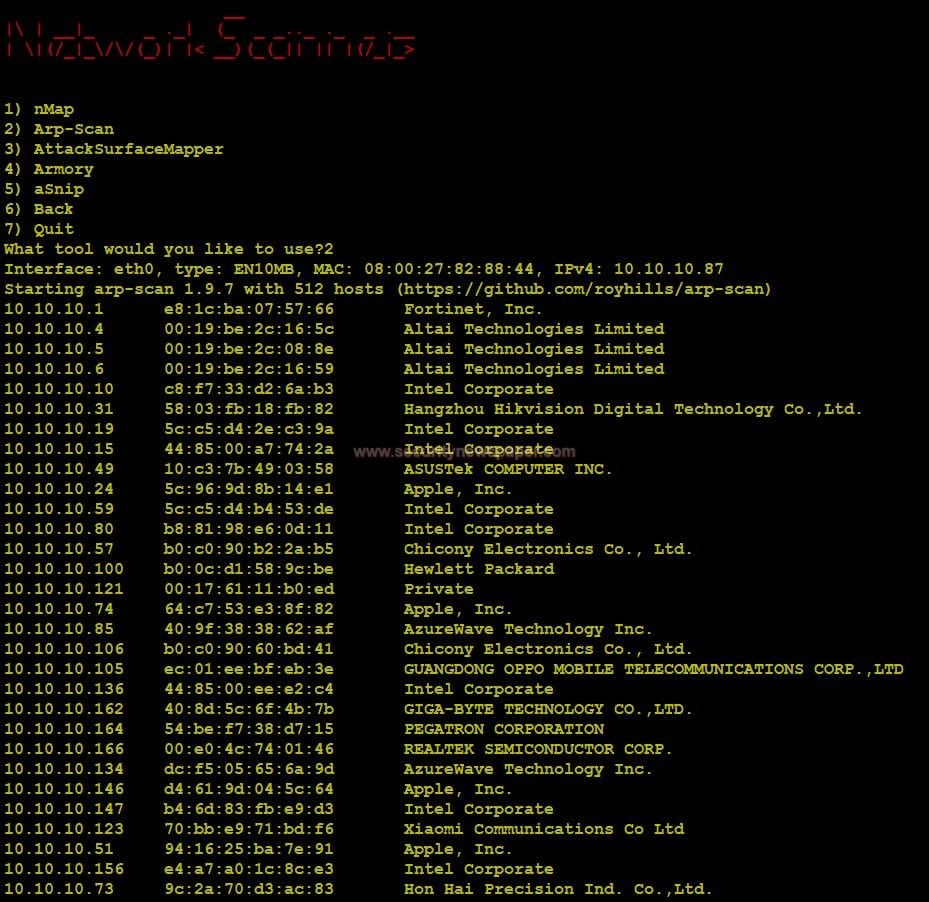
- Next, select option 2. To perform Arp-Scan
- The Arp scan displays complete IP’s and MAC addresses. Those, who are connected to your LAN (Local Area Network).
Website Scanner & Enumerators Module
A website scanner is used in security assessment and attacking the website. This tool collects the complete details of the target domain and also find a vulnerabilities in domain.
- We will show you a specific tool that shows unique information about the target.
- We have 4 tools in the website scanner
- Konan
- Nikto
- BlackWidow
- WPScan
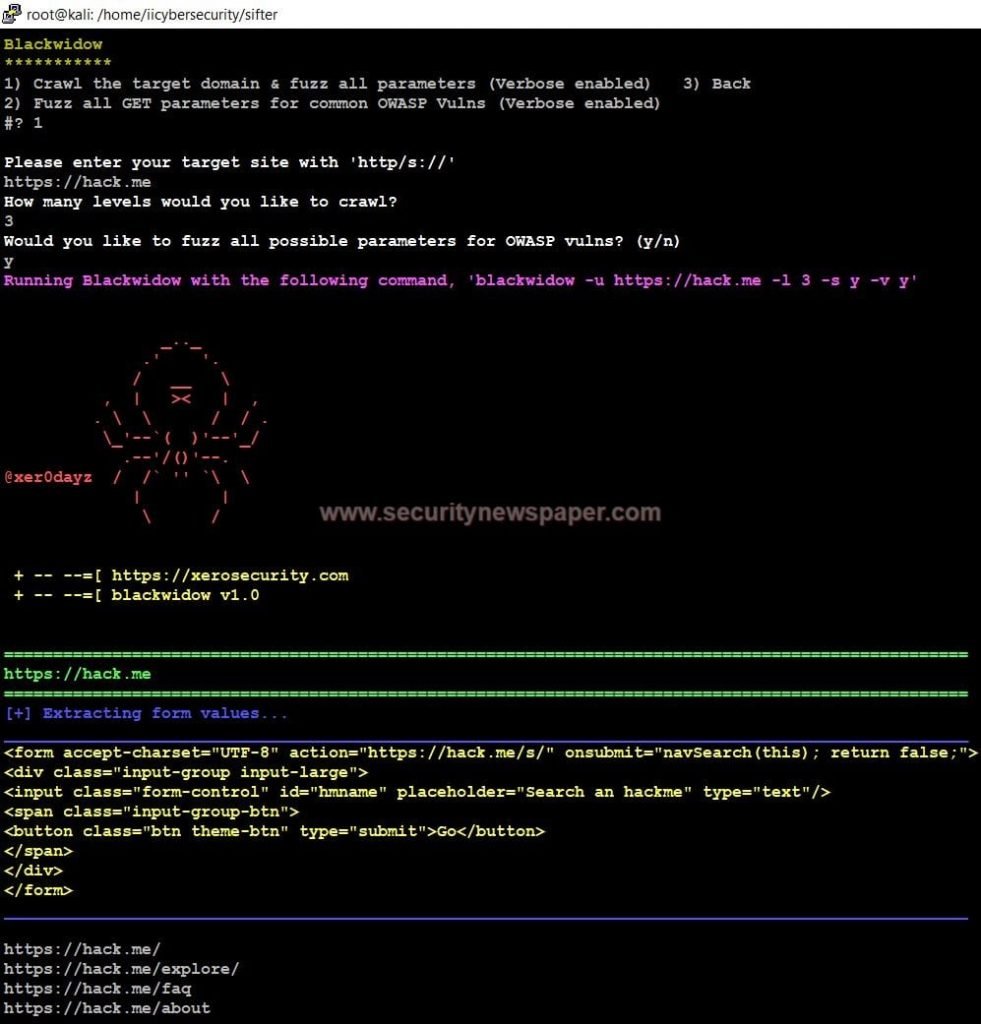
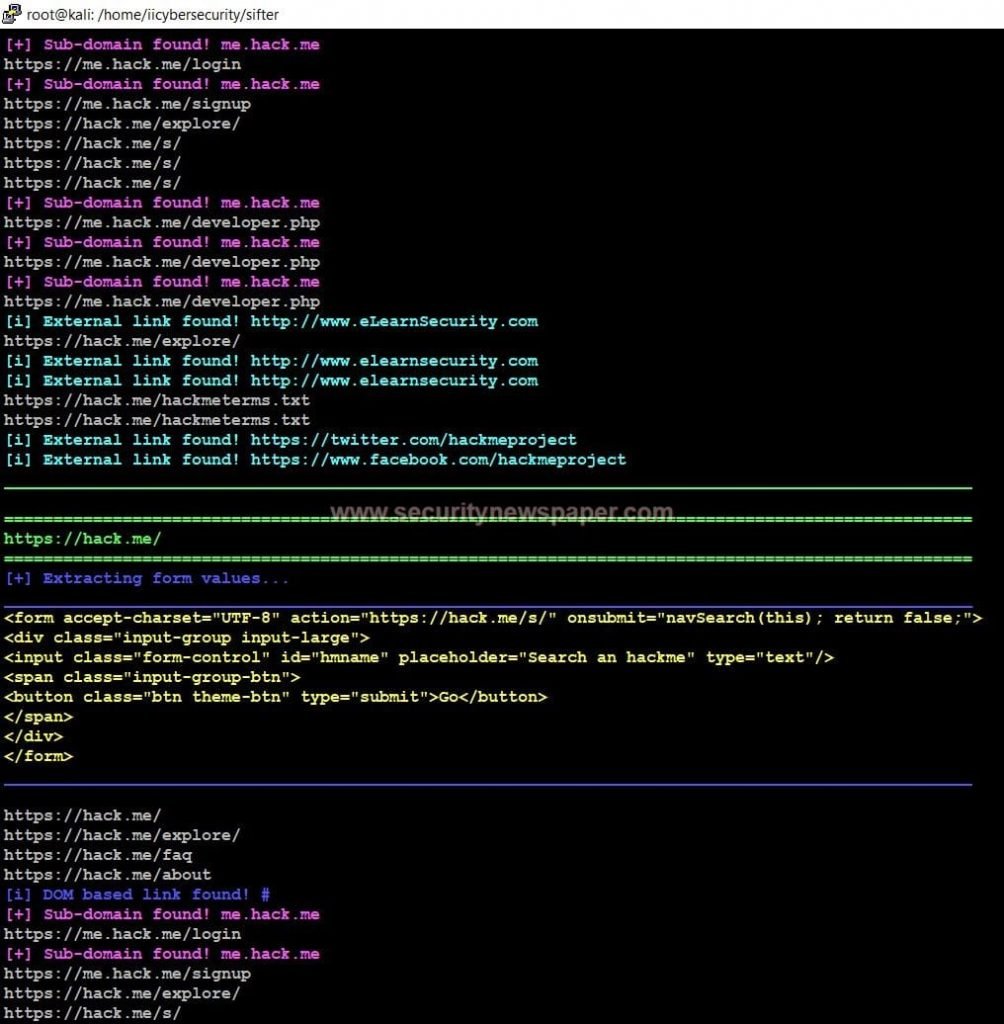
Performing this test, we can find out complete URLs of the targeted website. In a few cases, scanned results might save a folder. We can see the path, after completing the scan.
Vulnerability scanner Module
Vulnerability scanner is used for vulnerability testing. This vulnerability tools is used to find out the vulnerabilities on a particular domain.
- In the vulnerability scanner, we have 3 tools
- Flan
- RapidScan
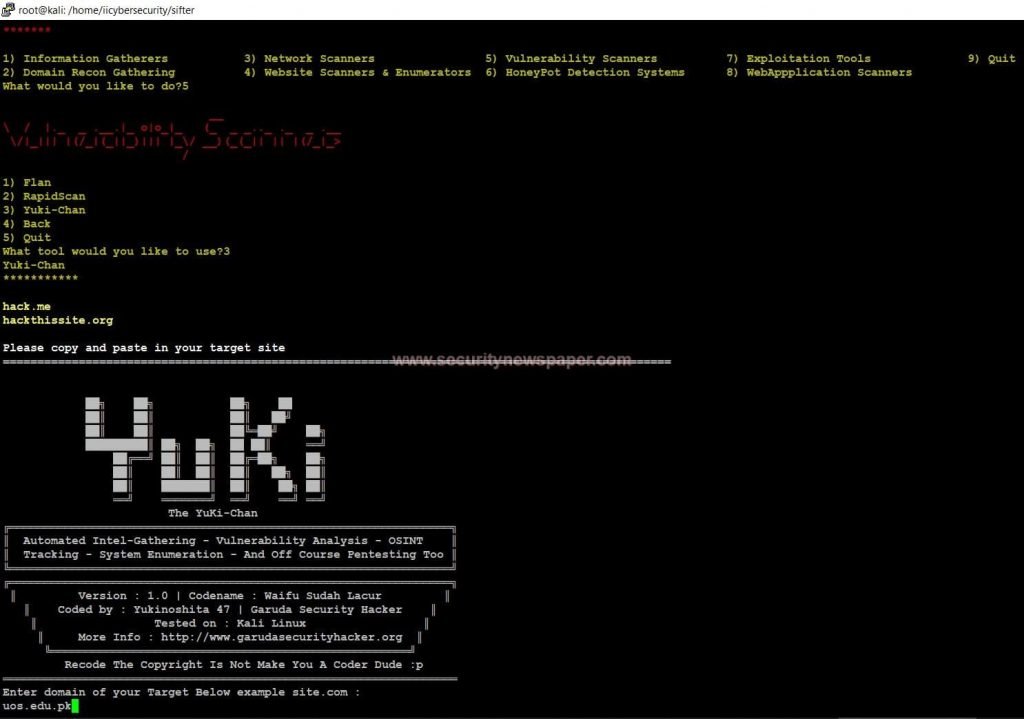
- Yuki-Chan
- Choose option 3, Yuki- chan to find out the vulnerability in a domain.
We can see the below image, how to assign the target
============================SNIP====================--
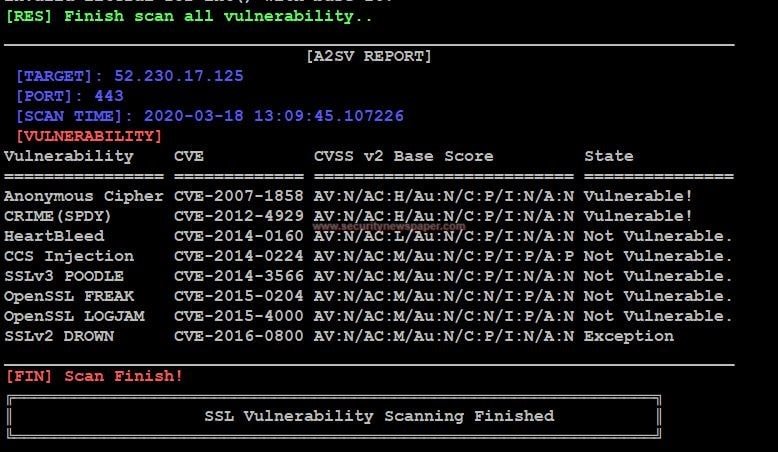
- Now, we can see the results of Vulnerability scan
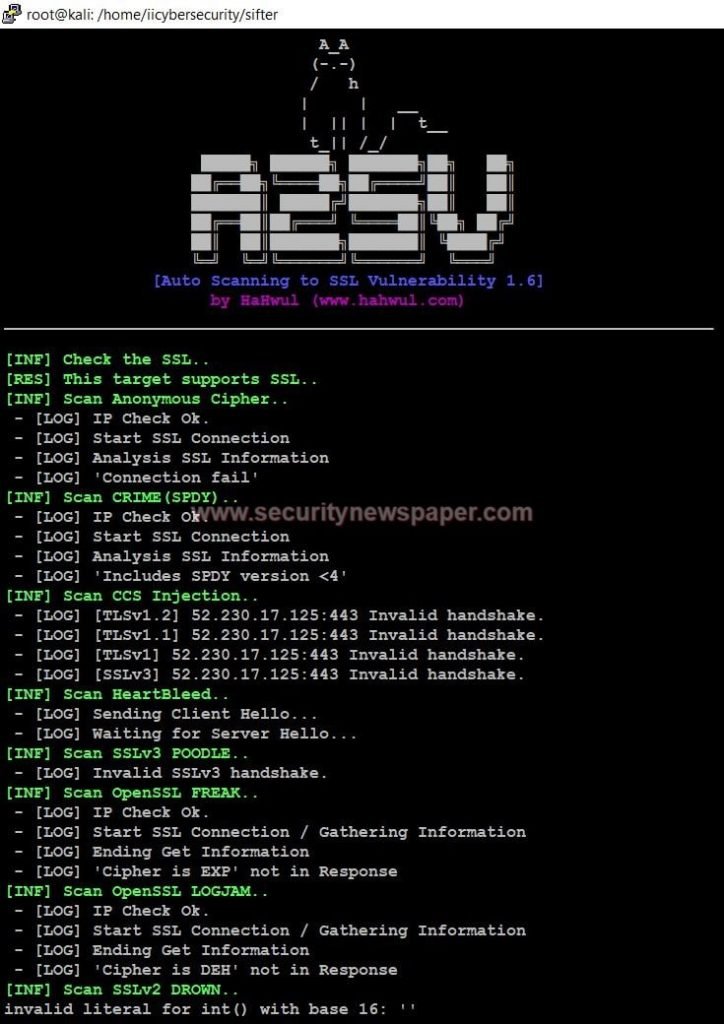
- Yes, we found vulnerabilities on a target domain. we can also see in the below picture.
Exploitation Tools Module
Exploitation tools are used for compromising the victim’s system, when the hacker finds vulnerability in system.
In the Exploitation tool, we have many classification. we will show the best tool, where we can check on real time environment.
- In the exploitation Module, we have 6 tools
- MS Specific Tools
- BruteDUM
- Tigershark
- Web Exploiters
- Search for Exploits
- FuzzyDander
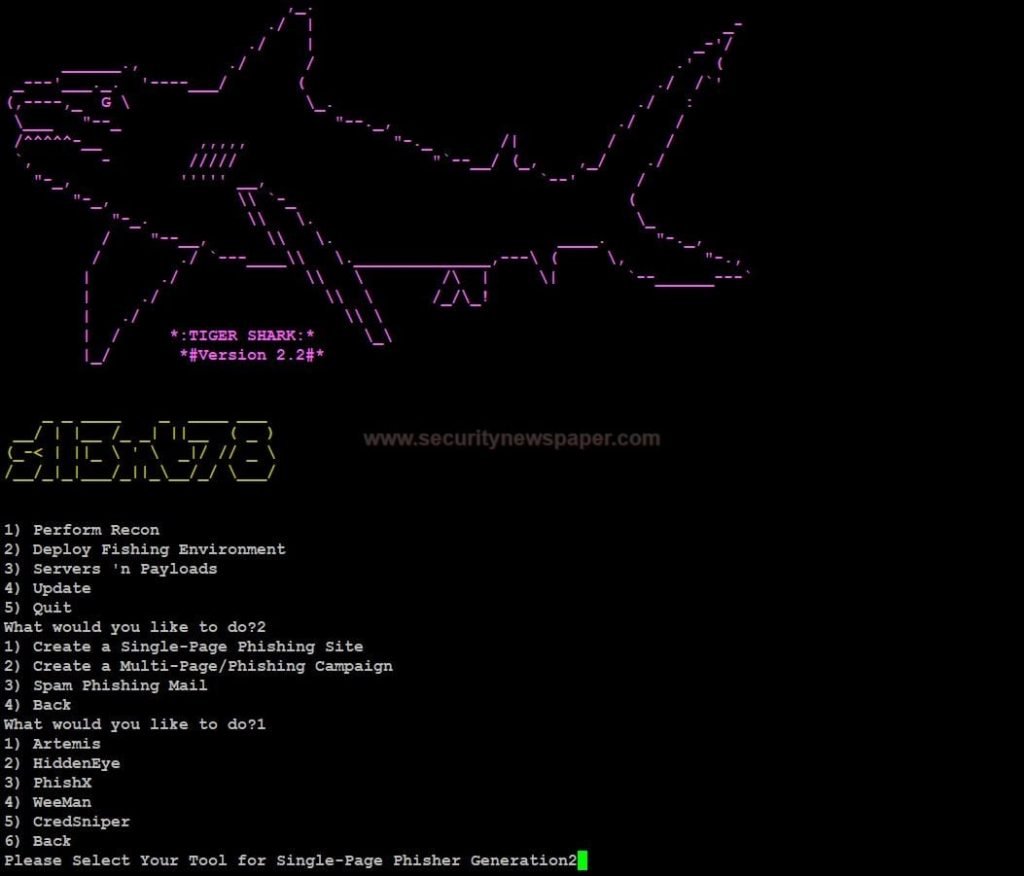
- select option 3 to run the Tigershark tool.
- In the Tigershark tool, we have 3 different tools
- Perform Recon
- Deploy Fishing Environment
- Server n payloads
- Select option 2 to use deploy fishing environment tool.
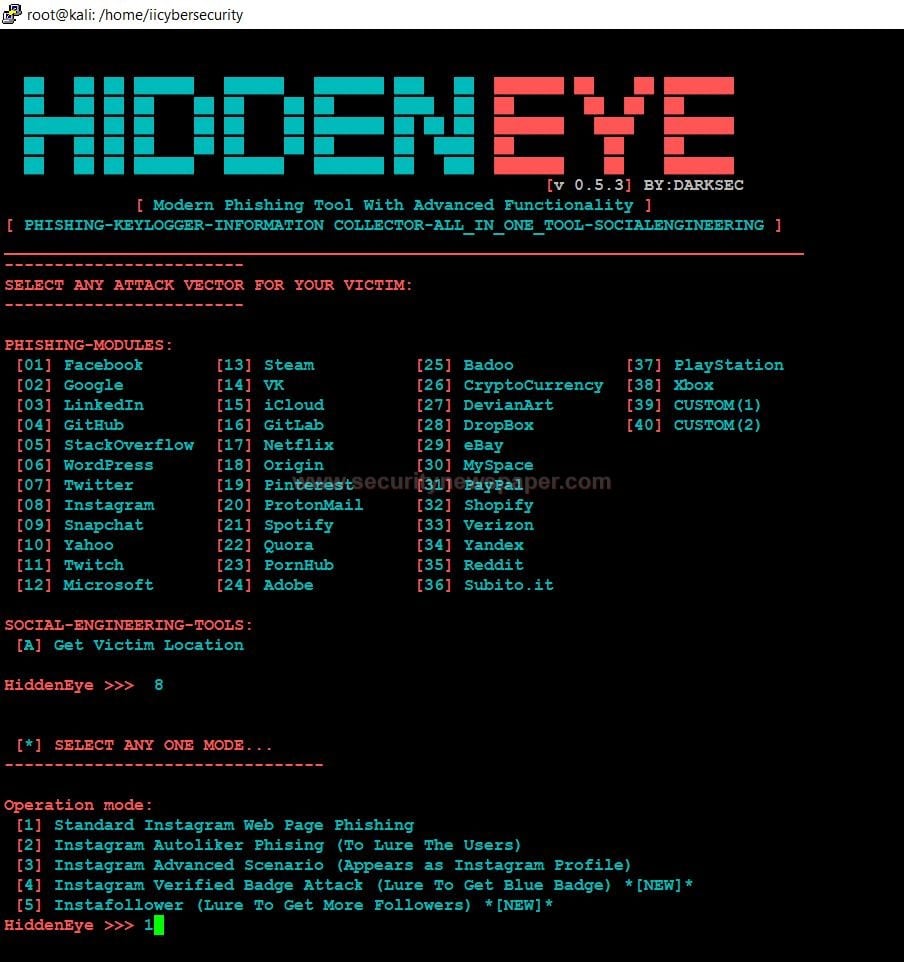
- Here, we can see the hidden eye options. By using options ,we can creates any phishing pages using HIDDENEYE Tool
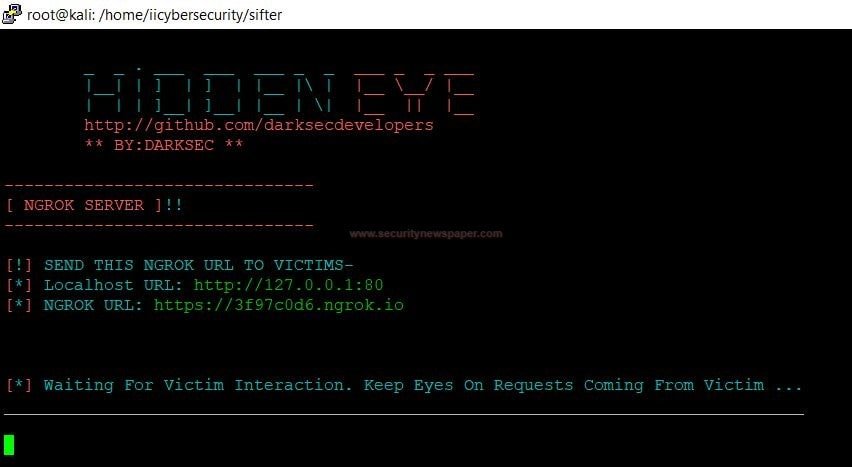
- Now, send this link to the victim.
- We have opened the URL in mobile phone browser. User will see fake login page.

- Once the victim enters the username password, it will be captured by attacker as see below.

Most of the attackers, use these kind of phishing pages and send them over to victim to steal credentials. So be conscious while clicking on any link.
Conclusion
Most of the hacker and penetration testers love to use tools which have everything at one place.

Cyber Security Specialist with 18+ years of industry experience . Worked on the projects with AT&T, Citrix, Google, Conexant, IPolicy Networks (Tech Mahindra) and HFCL. Constantly keeping world update on the happening in Cyber Security Area.


